Ever felt like you could use an extra pair of hands to manage your overflowing inbox and jam-packed calendar? Microsoft Outlook offers a solution for this. Think of it as having a virtual assistant. This feature, known as Delegate Access, lets you designate another individual, termed a delegate, to handle your emails and calendar on your behalf.
Why Use Delegate Access?
This feature is especially handy for professionals who have assistants to manage their schedules. For instance, a CEO might have their executive assistant handle meeting requests, emails, and calendar scheduling. But it’s not just limited to such scenarios; even peers can use Delegate Access to collaborate
What Makes Delegate Access Special?
Unlike the basic folder sharing in Outlook, Delegate Access offers more advanced permissions. You can decide if your delegate can only read your emails, or if they can also send, edit, or even delete them. By default, a delegate can fully access your Calendar and Tasks. However, if you want them to view all your inbox messages, you’ll need to grant extra permissions.
Note: This feature requires Microsoft Exchange Server and both you and your delegate should be using the same Office Outlook version.
How to Activate Delegate Access
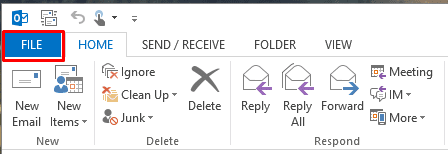
- Open Outlook and click on the FILE tab.
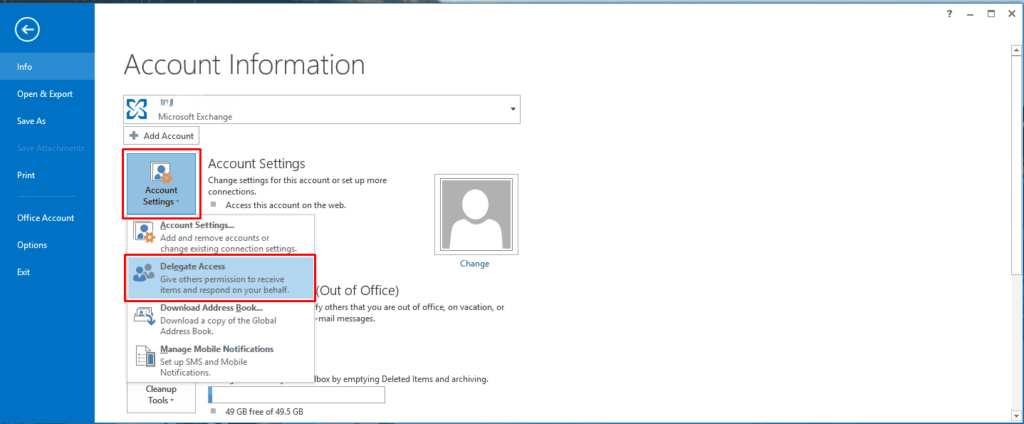
2. Navigate to Account Settings > Delegate Access.
3. The Delegates dialog box opens.
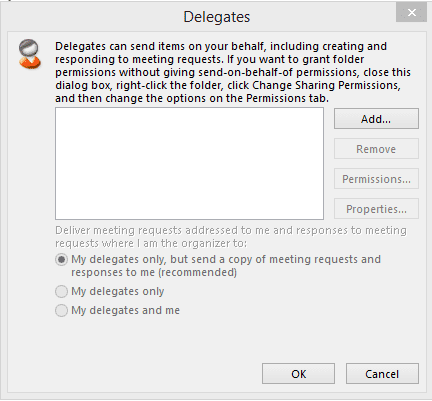
4. Click Add and choose your delegate from the Exchange Global Address List.

5. Set the desired permissions for your delegate.
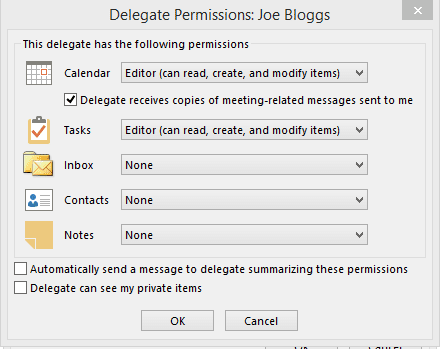
Remember, if you want your delegate to handle meeting requests and responses, the default settings are usually sufficient. Here is a breakdown of the Delegate Permissions.
In the ‘Delegate Permissions’ dialog, you have two choices: either stick with the preset permissions or utilise the dropdown menus to customise access levels for your Exchange folders. These dropdowns offer three distinct permission tiers: Reviewer, Author, and Editor.
Reviewer: This level grants the delegate the ability to view items within the manager’s folder.
Author: At this level, the delegate can view, create, modify, and delete items initiated by you. For instance, they can draft task or meeting requests in the manager’s Task or Calendar folder and send them as if they were the manager.
Editor: This is the most comprehensive permission. Delegates can perform all the actions an Author can, plus they can edit and remove items originally created by the manager.
Adjusting or Revoking Delegate Permissions
You can easily modify or remove the permissions granted to your delegate. Just revisit the Delegate Access settings and make the necessary changes.
Keeping Some Items Private
If there are certain appointments or emails you’d like to keep private, simply mark them as ‘Private’ in Outlook. This ensures that even if you’ve granted access to a delegate, they won’t be able to view these specific items.

